Fjell-Fjord
Location: Bygland – Syrtveit, Evje – Kilefjord – Kristiansand
April 22-25 (Tuesday-Friday)
Intro
The trip began with an introduction to Paul and Neik. They instructed us to split into our two groups and discuss some goals for the trip. This simple instruction gave the group the impression they were going to be lead for the duration of the trip and this would later cause some dramas. We all spoke about safety, fun, learning, etc. Both groups rejoined and then shared their goals. We would spend the canoeing element of the trip as one large group and would then split up for the climbing and cycling elements. However, we would still spend the rest of the time together for lunch, dinner, sleeping and whatever else at each base camp.
The trip ran as followed:
Tuesday 22:
- Canoe down river until we find a suitable island to camp on. Practicing paddling techniques and water navigation on route.
- Build improvised shelters for the night.
Wednesday 23:
- Paddle down river to Syrtveit dam.
- Overnight in Lavvu at TrollActiv.
Thursday 24:
- Bike from Syrtveit to climbing area at Kilefjord (20km).
- Arrive Kilefjord, collect equipment. Build improvised shelter for the night.
- Climbing, top rope and abseiling, personal practice.
Friday 25:
- Bike back to UiA via old railway network (50 km).
Canoeing

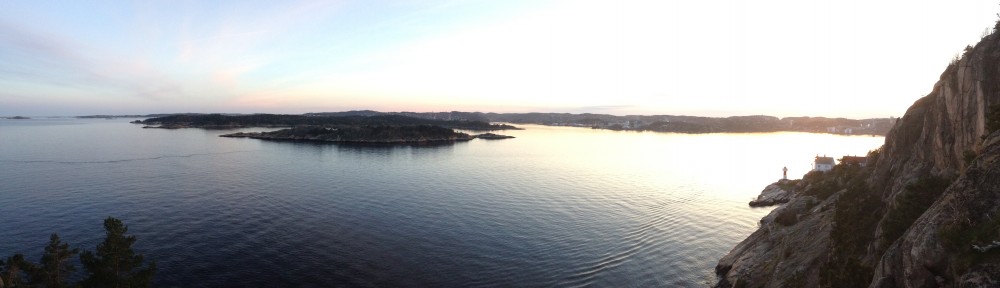
What A Top Day To Be Paddling
Laura and I were partnered up for the canoeing section of the trip. She had not done much paddling before and I had some experience from trips back home. After waterproofing our gear in bags or containers, we took it down towards the boats and gathered up. As two groups, we first orientated ourselves on the map, worked out where our final goal is for tomorrow at the Syrtveit dam, then how far we should

paddle each day, where we should camp and how long we think it should take. We packed in our gear as central and low as we could so that our centre of gravity was as stable as possible in the boat. We began paddling with Laura at the front and me at the back. It didn’t take long for the techniques to come back to me and I tried to teach Laura as we went.

Pack The Gear Low And Central For Good Stability
It was very relaxing to paddle along down the river with everyone. We had one short break for some food and began paddling again. As we turned around the corner, the wind became very full on and some members of the group began to paddle further and further ahead from the rest of the group. Eventually all boats landed on the beach and a discussion broke out between the group and the instructors about whether it was wise to split up as much as we did when some of our goals revolved around teamwork, friendship building and most importantly, safety.
We began the next day with a totally different mindset and we paddled a lot closer together for the entire day. We even played games like trying to keep less than 1 boat length between your boat and the boat infront so everyone was paddling in a line and following each other’s path. This not only improved teamwork but our ability levels as well due to many turns and twists that required a lot of steering and coordination between the canoe partners. Laura and I even felt confident enough to swap around and it was great to see her paddling the canoe with some of the strokes I taught her. I finished the second day of canoeing much happier than the first and we all took some individual time to reflect on the trip so far.

Practicing Our Paddling In Single File
Cycling
We began the cycling by splitting up into the two groups of mixed ability levels. We collected a bike and helmet each, then collected a few pumps, repair kits, maps and emergency mobile numbers between us. We set up the bikes how we wanted, identified the old traintrack we needed to follow on the map and set off with the front and back markers wearing high-vis vests. The seats were really hard which made the riding quite uncomfortable but the views were beautiful and this certainly made up for it. We had a few bike troubles along the journey, which resulted in us needing to call Tim for a replacement bike but there weren’t too many dramas. After a short stop in the Evje Kiwi for the last day’s breakfast and snacks, we set off again and made it to the climbing area in much less time than we first thought. In the evening, we sat around the fire and discussed how we went. Some members of the group stated they felt we were riding too slow whilst others didn’t see the point in rushing. A minor conflict revealed itself but we decided together to keep the groups the same and see what happens.

The Team For Day 1
We jumped on the bikes the next day and after about 3-4kms, we stopped and changed the groups because some people were rushing too fast. We made a fast group and a slow leisurely group. This way people could choose which group they wanted to be in and could focus on achieving similar goals to those around them. I stayed in the slower group and we had an awesome friendly ride home at our own pace and only arrived back 30 minutes slower than the other group. It was a great moment to see how everyone was able to resolve the issue without needing an instructor. Certain people took on a democratic leader role and others an autocratic to just fix the situation and move on. Great to see and be apart of such a turning point for the group.
Climbing
Simon, Paul and Neik ran a safety brief before we began the activities. One group would be abseiling/repelling first whilst the other group would be climbing and once the abseiling group was through, we would swap. We grabbed a helmet and harness each before splitting up with our group first to follow Simon up the hill. He explained the figure-of-8 device and how with the Italian hitch/munter hitch on one rope, he would be able to back-up belay us as we lowered ourselves down on the other rope. He also briefly explained the system he used for the rope set up on trustworthy bolts but then stated he would explain in more depth later. He asked for a volunteer and I said I would go first. He passed me a safety rope and asked me to hook in with the carabineer while I walked around to the abseil rope. I clipped into both of the abseil ropes, unclipped from the safety rope and began belaying myself down. When abseiling, you can lower yourself down at the pace you want but are totally safe in the event you slip. It’s lots of fun and according to Simon, it’s a good way to help you get over your fear of heights if you have one.
Just as we moved over to the climbing wall, it began to rain. They still showed us the figure-of-8 rethreaded knot to tie in and how to belay but we had already learnt how to climb with Nils back in Kristiansand. Climbing was extremely difficult on slippery granite and I didn’t enjoy it as much as I do usually. I was really looking forward to that part of the whole trip as well.
After we were done with both activities, Simon gathered us all together to explain and demonstrate a perfect top-rope set up for climbing. You can use bolts placed in the wall or natural features like trees and rocks. As seen below, a figure-of-8 rethreaded knot should be used to secure one end of the rope to something reliable, e.g. tree, rock or bolt. A sling with a carabiner on the end should be placed around another object nearby. A clove hitch should be used to secure the rope to this carabiner. The rope should now have approximately 30 degrees at the apex of the angle made by both sides of this rope. Once you tie a double figure-of-8 knot on the bite at this apex, insert two gravity loaded carabiners facing opposite directions into this loop, you can then adjust the clove hitch accordingly so the system is balanced. You are now able to place the dynamic climbing rope into the carabiners and tighten everything in the system.
Below are two of many different climbing setups you can construct. The one immediately below is most like the one Simon demonstrated to us. The overhand knot in the middle is a strange addition because although the loop would keep the carabiner from moving around, the overhand knot will just weaken the system. It’s better to use a figure-8 knot with one more twist as it will be stronger and easier to undo as well. 

Above is another way to construct a top-rope setup with a few changes. The right hand side shows a clove hitch attached to a carabiner and a sling which is exactly what simon said. However, on the right hand side you can see that a double bowline has been used instead of the double figure-of-8 rethreaded. At the apex in the centre of the picture, you can also see that two figure-of-8 knots loops have been used with instead of the single overhand knot. This is much stronger for the system and will be much easier to undo after as each knot will only be taking half of the strain in a shock-load if someone falls suddenly.
Shelters
Shelters are obviously a very important part of camping. A good shelter will protect the inhabitants from the conditions whether it be wind, rain, heat or even creepy crawlies. On the second night, we stayed in a teepee at TrollActiv and were not required to construct our own shelter. However, the other two nights we were and we decided to construct a lean-to for the first night and an A-frame shelter. We decided for these mainly due to the ground and attachment points nearby including trees, roots and rocks.
Lean-to:
Lean to shelters are the most simple form of shelters and are simply constructed to have a wall that leans on a slope. These shelters are great for allowing the rain to run off down the gradient of the slope and protection from the wind if it is blowing in one direction. For our lean-to, we were not sure if it would rain so we decided try and cover as much of us as possible and this meant that we had to reduce the slope. We were also not quite sure of the correct knots to use but did our best on our own. We agreed that when we get the opportunity to learn some over the next 3 days, we will take all of the advice we can.
A-frame:
Below are two examples of the A-frame shelter. The first is the girl’s shelter they constructed on the first night. They constructed this quite simply and cleverly by using the surroundings logs as dead weight to hold the sides down. As long as they raised the roof with some rope, as you can see they did quite well, then they have constructed the perfect A-frame. This has many of the same benefits of the traditional lean-to shelter but is a simple variation by closing off one more side. 

Above is the A-frame we constructed on the second night. This shelter was absolutely perfect for the conditions and the land we had to work with. There were two trees to tie a taughtline between. On the right of screen, you can just see where Erwan assisted us in tieing a dixie-hitch to really tighten the rope. We then had rocks, roots and other trees all around us that we could tie our tarp down to. We all slept comfortable and a little bit of snoring from certain members of the team wasn’t enough to keep us from getting a few good hours in.
Challenges
It was challenging to get everyone paddling at a speed we all agreed with. Some feel that it is better to keep speed up when paddling against the wind as you will get pushed back too far if you are too slow. Others felt that going too quick will just tire you out too fast and make no difference in the overall difficulty of paddling against the wind.
There was a similar issue when cycling as some felt they were more efficient when riding quicker whilst others weren’t rushing. It seems the common theme of the two activities was more group work than it was the activity itself.
It’s difficult to comment on the challenges of climbing. I climb regularly in my spare time so the set ups, knots and belaying were 100% familiar for me. The other two Aussies and myself were even able to add some unique input towards alternate set up ideas at the apex by tying two double figure-of-8 knots on the bite, then placing the carabiners through both. Climbing in the rain would obviously be the big challenge and this put a bit of a downer on the day for many of us.
I think out of everything, the shelters provided us with the biggest challenge. The first night was horrid when trying to find a nice place to set up. Once we did, we couldn’t make up our mind on how we should tie the tarps up to best protect us from wind and rain. The third night was much easier in setting up the tarp on a nice patch of land. The issue then came down to which knots to tie and how we wanted to tie them. With advice from Bokito, we decided to use the “dixie-hitch” to tighten the main line between the two trees. It was great to learn and despite it being a challenge, it was nearly one of the most enjoyable elements to the trip for me.

Post-Ride Yoga Looked Quite Challenging Too
References:
bearbreeder 2013, ‘Forums: Climbing Information: Beginners: What’s wrong with this anchor?’, online posting, 24 July, Rockclimbing.com, viewed May 5th 2014, <http://www.rockclimbing.com/forum/Climbing_Information_C2/Beginners_F16/Whats_wrong_with_this_anchor_P2631634/>.
michael1245 2010, ‘Forums: Climbing Information: Beginners: Top Rope Fundamentals’, online posting, 25 November, Rockclimbing.com, <http://www.rockclimbing.com/cgi-bin/forum/gforum.cgi?do=post_attachment;postatt_id=5373;t=search_engine>.