The area

Click here for Snow Hole Trip Area video
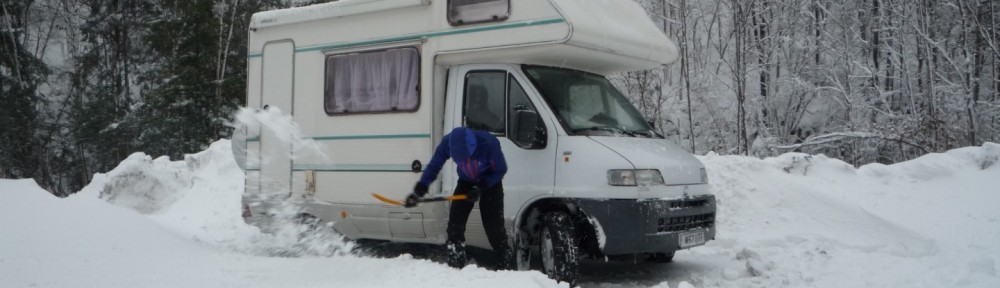
The location of this trip was east Setesdal, Berdalsbu between Hovden and Evje. The geography of the area mainly consisted of rolling mountain summits between the height of 1000 and 1300 metres. Many of the valleys are deep and steep, cut by rivers. The tree line rose up to around 1000 metres. The ground was covered in a mixture of thick and thin snow; some areas had rocks protruding through the snow which made it harder for myself and the beginners, as only the tops of rocks were visible causing problems not being able to stop or steer around the dangers as they were difficult to see. During this trip the snow was old snow; as Swixsport (no date) explains it is snow that has gone through an entire metamorphic change from the soft snow crystals (flakes) to water and then back to ice. This meant that the conditions for skiing were very difficult for novices; it was only really possible to move around using mole skins, a piece of information that would have helped to know of before I applied klister to the bottom of my skis. I learnt that I could not use mole skins due to the reaction that would take place between the mole skins and the klister, something that I would later regret.
Learning outcomes
Some of the learning outcomes looked at what equipment we would use; although I was more interested in areas such as winter navigation and improving my skiing technique. However, this trip may not have been the best setting to do either as having to carry a large rucksack, as Juhani et al. (1986) explains would hinder my ability to ski while having to focus so much on skiing. This intern hindered the amount of time I could dedicate to the navigation aspect of the trip. Another part of the trip was to look at how to construct a snow hole and emergency shelter.
How to construct a snow hole
Once a suitable location had been found the group was told where and how to dig the snow holes by the instructors. According to O’Neill (2005) having ownership of your learning is key but during this trip due to the instructors it felt that part of the learning process was taken away; as they had removed the individuals ownership due to not letting people try things for themselves. Many of the group did not know how to construct a snow hole and so needed guidance; perhaps time restraints or wanting to get the snow holes made so the instructors knew the group had shelter was the reason, however the weather was good and there would have been plenty of time. Every group was told how much longer the holes should take and a time was given to have them finished, there was a feeling that the instructors wanted to leave the group sooner rather than later.


Click here for inside of snow hole video
According to Macnamara (2014a) the basic design should have a small narrow entrance. Once this thin opening is deep enough (three meters) we could start to dig out an area to sleep on, this of course needs to be long enough to lay on and as the group consisted of five people two sleeping areas where dug on either side of the entrance tunnel; one big enough for the three males and the other big enough for the two females. It is a good idea to then block up as much of the entrance as possible (except for the very bottom) to not only protect against the wind but also to allow cold air to flow out keeping the warmer air in the hole. Macnamara (2014a) goes on to explain how to reduce the amount of melted snow from dripping onto the occupants, something that was not talked about on this trip. This involves making the roof as smooth as possible so that the melting snow runs down the sides and walls, a trench is then made at the bottom of the wall on the ground so the melted water can run away and not pool under the sleeping area.
During the second day we stopped for lunch and to make an emergency shelter, this was made by digging into the snow bank up to around one metre, making a seating area with headroom. Skis are placed upright and in front of the hole that has been made, these form a structure to pile up blocks made from the dug out snow to form a barrier that will protect the occupants from the elements.

An emergency shelter should be something that you can make in an emergency such as a snow trench as Macnamara (2014b) recommends. I feel that the type of shelter we were told to make (although great in its self) is better suited as a shelter that one would construct in advance to wait out a storm:. This is due to this shelter needing to have the correct snow amount and conditions in order to build it. The terrain that we were in was very bare regarding snow depth, the shape of the hills/mountains meant that the wind could blow much of the snow away leaving few snow drifts that would have the correct conditions to make this type of shelter.
Regarding learning to navigate over snow covered terrain, members of the group where given the chance to lead the rest of the group, however I feel there was a lack of guidance from the supervisor, as a result poor route choices and group management were encountered with the group becoming separated, this also meant that only part of the group was able to take on this leadership role.
Improving my skiing technique
I feel that this learning outcome was not achieved, due to a brake down in communication it was not clear that the group would be given mole skins resulting with me making the decision to apply klister to my skis (having been out in the ski condition in the area before the trip and finding that the grip wax was not suitable due to the temperature and snow conditions); this meant that I was unable to use the mole skins. As my skiing level is that of a beginner, I found that the entire trip regarding skiing to be very challenging with no chance to allow me to improve or work on any kind of technique. I understand this was an unfortunate consequence of the snow conditions and wonder if it may have been more beneficial to arrange the trip earlier in the year before the climate begins to get warmer. In the situation as it was I feel I may have been able to work on my navigation skills more if I had mole skins as this would have allowed me to stay with the group more and be a part of the process.
What are the main challenges working in a winter environment?
While this trip was on snow covered ground the sunny weather meant that rather than having to deal with the cold it was more relevant to deal with over heating and sunburn. Staying cool and not overheating so as not to cause sweating was important as this could have lead to a chill.
Navigation is difficult due to the ground being covered in snow which can hide features such as walls or a body of water; therefore it becomes necessary to be able to use the contours on the map to help locate your position on the ground, therefore I feel that more time could have been spent looking at the map and relating the information to the ground.
Equipment
Snow shovel:
I used both a wooden handled and aluminium version and found that they both had advantages and disadvantages. A wooden handle provides a warmer grip however when this gets wet it becomes very cold. The aluminium version packs down to a smaller space than the wooden version due to the construction allowing the handle to slide inside itself, it also has a waterproof plastic grip on the end which stays warm and does not soak up liquid and become cold, this means that the cold does not transfer to your hands making you cold and therefore losing energy as you try to keep warm. The disadvantage with the aluminium shovel was that it jarred my hands and arms much more than the wooden one each time it hit the compacted snow while digging meaning that my wrists, fingers and elbows were sorer than when I used the wooden shovel.
Probe:
This tool is essential to be able to identify which area will have enough snow to be able to dig out the correct size snow hole. Its construction is very simple being a collection of small straight pieces of metal (similar to a tent pole) which join together and are pulled tight by an internal wire that can be locked in place so that when the pole is pulled out of the deep snow the sections stay together.
Snow saw:
I found that this particular saw (the way the handle is angled at 90 degrees from the blade) makes it painful to use, having used a snow saw which looks more like a kitchen knife (handle and blade in line with each other) I can say that the one used during this trip was not as good, however this may just be my opinion.
Klister/mole skins:
I found applying klister difficult, both myself and another group member cut the palm of our hands on the edge of the ski when trying to apply it. Although it does provide grip when travelling up hill, the grip is so dependant on the snow that there are moments where the snow texture changes and it can catch the skier off guard, this did not seem to be the case for those that were using mole skins. Another draw back to the klister was that when the terrain became steep I had to traverse in a zig zag pattern to reduce the steep slope angle; if I did not the skis would quickly slip backwards, again something that those with mole skins did not have to worry about as the mole skins have grip on many more snow types compared to the klister. It was also necessary to reapply klister through our the day as like other waxes it wears off unlike the mole skins that once on they stay the same throughout their use.
Clothing
The instructors advised people to use gloves while digging, however I decided to experiment without them to gain firsthand experience of what works best for me. I know that I can get very hot and sweaty during physical activity as I put a lot of effort into what I’m doing, I was concerned that I would make my gloves wet with sweat and be left with cold hands for the rest of the evening (as wet gloves = cold gloves in cold conditions); as a result my hands were kept warm during the activity and I was able to put my dry gloves on after digging. I observed other people pulling off dripping wet gloves and hanging them to dry, however this led to them freezing and people being gloveless during the evening as they did not have spares.
Food
According to McCoy (2014) a 155 pound male will burn 563 calories in an hour of cross country skiing at a moderate pace. The amount of calories that I would have expected to use was not that much higher than a normal day of exercising, as the group was large and the work intensity low over the day, it was the cold weather during the night that concerned me, however because of the equipment that I was using this was not a problem. I would have expected to use around 500 to 1000 extra calories each day which my menu did cover due to the extra calories that the lunch of pasties would have given me compared to what I would normally have at that time.
Breakfast consisted of hand made pancakes (flour, milk, eggs) filled with bananas and sugar.
Lunch for both days was vegetable and nut pasties. These were hand made before the trip and consisted of pastry (flour, butter, water and salt) filled with vegetables (carrots, potatoes, broccoli, cauliflower, courgette, mushrooms, suede) and cashew nuts in a gravy sauce.
Dinner on the first night consisted of boiled rice with a mixture of vegetables in a chilly sauce. The second night’s dinner was spaghetti with again vegetables in a packet pasta sauce.
For snacks I carried nuts and a sultana mix, marzipan and chocolate along with a selection of pick and mix sweets.
Shelter
During this trip I stayed in a snow hole and also slept outside in a bivi bag, each group also constructed an emergency shelter although this was not to stay in; simply an exercise to make one. The group that I was part of made a snow hole big enough to house five people.
The snow hole provided excellent protection from the wind, snowfall and the cold. The length of time (over four hours) and amount of effort it took (a lot) to construct means that it is perhaps more useful when having a base camp that you will stay at for a longer period of time; it seemed like a lot of work for only two nights. Before we could sleep in the snow-hole for the second night it was necessary to scrap off a thin layer of melted snow from the ceiling of the hole that had melted during the first night from the warmth of the people sleeping, this meant having to move all our kit around each time so that it did not get wet from the scraped ice, this could be considered a nuisance if you were using the snow hole for a long period of time. According to Mountaineering Ireland (no date) and Lewis (2011) it is important to make a hole in the roof to allow air to flow inside the snow hole, however this was perhaps not needed in our shelters as we were told to leave an opening at the bottom of the entrance where as others suggest blocking the entrance to stop snow and wind from getting in. When compared to a tent I think that I like the quietness of the hole but the time it takes to make I find it hard to see many reasons why I would choose this over a tent.
Each group (four in all) although digging in the same area all came up against different snow conditions within the slope. Each group used probes to check that the depth of the snow was enough; however this only tells one story and groups found hidden trees under the snow once they had started digging. Some groups found the snow to be so compacted that it made the going very slow and hard.
For the second night a group member and myself decided to sleep outside in our bivi bags, although warm I can see that both the snow hole and tent win on the fact they have space for your kit and they offer a place to change clothing if needed where as the bivi is open to the elements.


Skiing with a heavy back packThe weight of the back pack was not an issue regarding the physicality however having to carry a heavy back pack and still be able to move my body weight quick enough for when I could not balance myself on the skis was difficult. The only way that this could be aided was to ski very slowly. I found that the uphill slopes and flat ground were no problem at all, the problems started when I had to go down anything more than a gentle slope, perhaps due to using klister rather than mole skins added to this problem.ConclusionI feel overall this trip was a good experience and allowed me to gain new skills and knowledge, I improved in some areas like digging a snow hole and other shelters, as well as what clothing to wear and what food to take and eat, however it restricted me in other areas such as my ski technique and winter navigation. I feel that my food was adequate for the trip and I would have no reservations of taking the same in the future. The lack of structure meant that many of the group where unclear as to what they were meant to be doing in regards to any learning objectives. Due to the temperature and snow conditions perhaps snow shoes would have been a more sensible piece of equipment to use rather than skis. For a group that are still new to skiing coupled with the poor ski conditions I felt there was very little improvement in skiing that took place, with several occasions where the whole group removed their skis to walk over areas that were found to be too hard and therefore dangerous. Snow shoes would have allowed the group more chance to work on winter navigation and would not have detracted from the other areas of shelter building, group leadership, moving with a back pack and so on. ReferencesJuhani, I., Pekka, S. and Timo, A. (1986) Strain while skiing and hauling a sledge or carrying a backpack, European Journal of Applied Physiology and Occupational Physiology. 55, 597-603. Lewis, P. (2011) How to: Make an emergency snow shelter. [Online] Available from: http://www.ukclimbing.com/articles/page.php?id=3525[Accessed 29 May 2014].Macnamara, T. (2014a) How to build a snow cave, [Online] Available from: http://survival.about.com/od/7/a/How-To-Build-A-Snow-Cave.htm[Accessed 24 May 2014].Macnamara, T. (2014b) How to build a snow trench shelter. [Online] Available from: http://survival.about.com/od/7/a/How-To-Build-A-Snow-Trench-Shelter.htm[Accessed 24 May 2014].McCoy, W. (2014) Calories burned in cold weather. [Online] Available from: http://www.livestrong.com/article/292221-calories-burned-in-cold-weather/[Accessed 24 May 2014].
Mountaineering Ireland(no date) Emergency shelters and snow holes. [Online] Available from: http://www.mountaineering.ie/Climbing/WinterClimbing/emergencysheltersandsnowholes/default.aspx [Accessed 29 May 2014].
O’Neill, T (2005) Uncovering student ownership in science learning: The making of a student created mini-documentary, School Science and Mathematics Journal. 105 (6), 292-301
Swixsport (no date) Waxing guide for skating and classic skiing. [Online] Available from: http://www.swixsport.com/dav/d7acfe9e2f.pdf [Accessed 25 May 2014].