The trip was our first “official” overnight trip with the Outdoor education group. The location was the local forest area, and the objective of the trip was mainly to get our gear and equipment tested and growing our confidence and abilities to camp overnight in outdoors.
Packing rucksack
The day started with a lecture where we received plenty of useful information before heading out into the woods. We started by checking the rucksacks that each of us had, and by the example of my rucksack we went through what were the key equipment to have, and how to pack them in the most convenient manner.
I learned that the best rucksack is one without many straps, and zippers because it would be likely that they break at some point over time.Another thing was the order of packing the gear: start with the things you need lastly, and it goes roughly like this:
-
a big bin bag on the bottom for the protection of the whole gear
-
Sleeping bag, mattress
-
Spare clothes + first aid kit
-
Cooking equipment
-
Food
-
Rain clothes/ shells
-
Easily accessible stuff: raincover, hat, gloves, map, compass, snack, water, knife, lighting equipment, repair kit, paper.
In my case I could wrap the mattress over my sleeping bag and place it as a cover for the other gear. Another very important thing to do, is to raincover everything. Although one has the raincover for the outside of the entire rucksack, everything inside the bag is recommendable to cover. This can be done with regular plastic bags, or more durable dry bags that can be purchased.
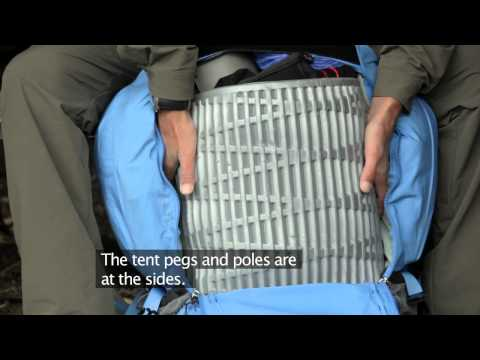
Picture 1. How to roll everything inside the mattress (http://www.fjallraven.com/kaipak-28)
Storm kitchen
We also briefly discussed the usage of the storm kitchen/ trangia. I learned that the fuel called red spirit has to be placed in a small burner (the brass colored) and it is placed almost at the bottom of the trangia, filled up to the “ring level”, and after usage burned to the end, or carefully cleaned before placing it back to the trangia and rucksack. This is especially important in order to prevent the leakage of the red spirit over your equipment.
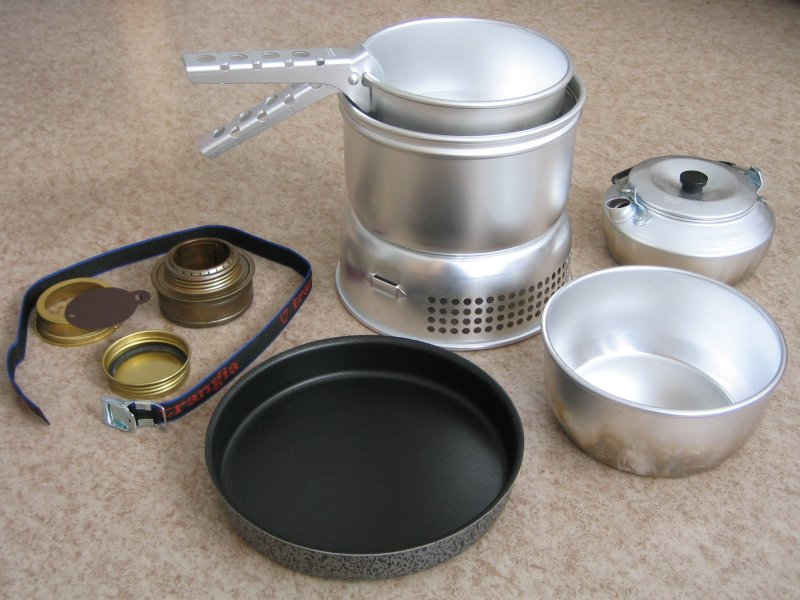
Picture 2. Storm kitchen (https://fi.wikipedia.org/wiki/Trangia#/media/File:Trangia_27-4.jpg)
After the lecture we headed out towards Jegersberg. The weather was cloudy, around +1 degrees, and the forecast said it would start to rain at some point during the night. With this information Len (the teacher) decided that we would build the shelters/ tents at first, so that we would not have to do it in the possible rain later.
Tents and shelters
Me, and a few other girls did not have our bivvy bags yet, so due to the possibility of the rain we decided to sleep in a tent instead of a shelter. We had already practised setting up of the tent so we had an idea what we would need to do. Firstly, we spend some time picking up the spot for the tent. I had learned that when picking the spot, one should avoid camping below a hillside so that the water would leak to the tent. For the same purpose camping straight under a big tree, would not be recommendable, however in case of a windy or stormy night some shelter should be looked for from rock, trees, hills etc. We found a nice dry spot close to a top of a hill, where the ground would round a little upwards. This also reduces the rain from piling under the tent. Further, the place had trees around it so some shelter was provided. When set up the tent in following order: we put a tarp under, attached the tent with pegs first from the front and back, threaded the poles, pegged other straps, and attached the inner tent inside.
Group dynamics tasks
Up next were the group dynamic tasks, which each nationality had to prepare for the trip. The tasks should include three elements which were the cultural-, physical- and physiological aspects. After each performance we would gather around and briefly evaluate the design and outcome of the task. Most of the tasks were versatile and included a lot of communication, contact and problem solving in a group, all factors important when getting to know new people, or improving a cohesion in an existing group.
After evaluating the tasks we agreed that some games were more suitable for younger, and some for older age categories. However, a lot of games would suite for all age categories. A good thing was that we got great examples where the group was divided differently, e.g. in two, in sub groups, and even some tasks could be done in pairs. There were games that required verbal but also non-verbal communication and problem solving.
Majority of the tasks were familiar to me as I had been playing them in some form in different camps and with different sports teams in Finland. One game however new to me was particularly funny and this the Brits game called “chicken chase”, which was both fast paced and extremely funny and I am definitely going to use in the future. Basically the group was divided in two teams, where the other team throws a rubber chicken as far as they can, while the other team’s purpose is to fetch the chicken as fast as possible and pass it in line, while the throwing team forms a tight group and one member tries to score as many rounds as possible around the group by running. Difficult to explain, but very funny!
In general, I could see that the team building was efficient, and had a positive effect on our whole group. It also gave us a bunch of great examples to use in the future as team building activities. Something to think about when organizing the games is the temperature if you are outside, and in which order you want to conduct the tasks so that people do not get cold. Further, you naturally want to think about the age of the group, for example children have less capability to concentrate for a long lasting tasks. Maybe also whether the group you have know each other beforehand so you might want to facilitate a few icebreaker games in the beginning.

About the gear
For me this was the second night I spent outside in the winter time, so I knew what to expect as the temperature and the weather was quite similar to the previous experience. The temperature was a little bit below the zero, and my sleeping bag had a comfort zone of -1 degrees, which as I experienced is individualistic. I was a little cold, therefore I learned that I have to buy a warmer sleeping bag for lower temperatures, and possibly another mattress to go over the existing one, because I could feel the cold hitting my back as well. Maybe because of the coldness or just not being used to sleeping outside I slept quite badly the both nights, but I guess it is just something that one gets used to when spending more nights outdoors.