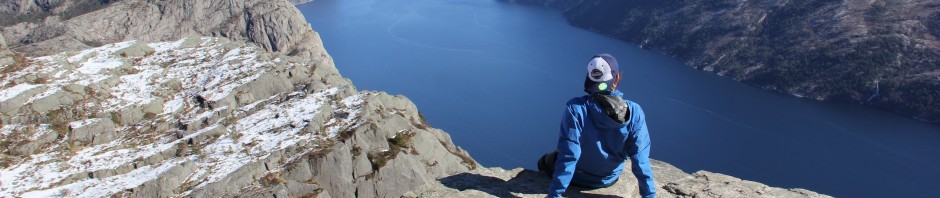
Our Mountain to fjord trip was centred around 3 main activities that we were to participate in, being: Canoeing, Climbing and Cycling. The following will report my learning’s and what I have understood from what was taught throughout the trip.
Canoeing
Canoeing can be a very relaxing, enjoyable, effective and efficient way to travel down a river when performed correctly. However, considerations need to be made whilst canoeing and a knowledge of canoes and technique needs to be known.
Safety considerations:

- Nayarra wearing her PFD -
- Always wear a life jacket when canoeing. Regardless of swimming ability or proficiency in deep water, a life jacket or PFD (personal floatation device) must always be worn in a canoe.
- Ensure that any gear and equipment in the boat is waterproofed effectively. Lining a rucksack with a garbage bag and then placing the bag inside another garbage bag is a simple solution. Large plastic tubs can also be effective as these will float upon capsizing.
- Balancing the canoe is vitally important. As canoeing is generally a 2 person activity, the larger of the two sits at the back, as to slightly lift the front of the canoe up. All gear is placed in between the two paddlers to increase its centre of balance and stability. Remaining seated is very important when canoeing. Standing up causes extreme instability and can cause capsizing, so remaining seated is vital.
- Paddlers can choose either to kneel or sit in the canoe. It is merely a matter of preference and comfort, however, generally speaking, kneeling in the canoe provides greater manoeuvrability and reach when performing strokes.
- Having knowledge of the area and weather conditions is vital. Knowing different features on the map, the wind conditions of the upcoming days, high and low tides among other things are very important to have in mind. Knowledge of escape routes, islands, and other beaches to pull up on are very important.
- Taking care in where you dock the canoe is critical. Docking on a rocky area or another place that will incur damage to the canoe is not ideal.
Canoeing technique
The paddle should be held comfortably on the T grip. While holding the paddle vertically, with the blade facing the ground, pronate your hand and place your palm on the top of the grip. Grip it firmly with the thumb and fingers and never let go!

- Nina performing a J-Stroke -
Keeping control of the canoe is vitally important and steering can take some time to get used to. In a canoe, the person sitting at the back of the boat has the job of steering the boat using a variety of techniques, and the person at the front’s job is to paddle and maintain a good rhythm. Different strokes include:
- Forward stroke: Performed by both paddlers, lean forward and place the blade into the water, using your back and core, pull backward, moving the paddle through the water. Repeat this action. If the arms become tired, try and focus on rotating your core more effectively.
- Backward stroke: Performed by both paddlers, and is the exact opposite of a forward stroke. Lean back, rotate your core and push the paddle towards the bow of the boat.
- Draw stroke: Performed by both paddlers, this stroke controls sideways movement of the boat. Rotate your core so you are facing perpendicular to the bow of the boat, reach outwards and place your paddle in parallel to the boat. Pull the blade to the boat, rotate it 90 degrees, push the blade back out, rotate it so it is parallel, and then repeat. If both paddlers simultaneously use this technique, the boat will move sideways.
- J-Stroke: A J-stroke is a corrective stroke performed by the back paddler. The stroke begins as a standard forward stroke, but at the end of the movement, the blade is twisted so the concave side of the blade faces away from the boat and pushed in that direction. You should create a ‘J’ in the curvature of the paddle. This stroke can also be used when canoeing alone. Performing multiple J-strokes will see the boat create a straight path through the water.
- Stern Rudder: This stroke is also only used by the back paddler. It simply involves placing the blade in the water at the back of the boat. This simple movement will force a change in direction depending on the side of the rudder.
Climbing
Climbing, when done correctly and safely, can be a very safe and enjoyable sport for all ages and abilities. It involves a wide variety of fitness components and challenges individuals physically, emotionally and cognitively.
Safety considerations when climbing:
- Before climbing, always check the following
- Check your anchor points. Are the set up correctly? Is the anchor stable?
- Check the harness. Is the harness fitted properly? Are the belts and buckles tight?
- Check the Karabiner and Knots. Is the Belayers Karabiner closed correctly? Has the climber appropriately tied their rethreaded figure 8 knot?
- Check that the Belay device is set up and functioning properly. Has the rope been threaded through the ATC and the karabiner appropriately?
- Finally check everything else is set up and safe.
- Climbers, Belayers and others standing around the crag should always wear a helmet, for two very important reasons
- If a climber takes a hefty fall and knocks their head without a helmet, the impact can cause serious damage and leave them as a dead weight on the rope.
- Falling rock that is pulled off by a climber or unfortunately falls from a crag can fall at a serious velocity and cause injury to those below. If a rock is falling down and you notice it, yell ROCK to inform others that the rock is falling. If you hear someone call this, don’t look up.
- Weather is a very important aspect to look at. Climbing in wet weather is near impossible. Wet rock becomes very slippery and makes gripping cracks and ledges near impossible. This can lead to injury and frustration for beginner climbers. Wet holds can lead to wet hands and when the hands and fingers become wet, skin can be damaged much easier. Very hot days can lead to dehydration and sunburn, so appropriate measures must be taken. Although actual climbing conditions may be good in the warmth, rapid body deterioration can occur.
- When bouldering, or climbing without a rope, spotting a climber is very important. Standing behind a climber as they are climbing, with your hands raised and your feet stable, watch the climber and as they fall, guide them to the ground, protecting their fall and softening their impact.
- Belayers should have a proficient knowledge or base understanding of belaying and the risks involved. Beginners should be given a crash course in belaying and should be watched or backed up for the first few times the belay.
How to set up a Top Rope Set Up
A top rope set up is a rope system used to safely climb up a rock face. It is a basic but safe system that will be described step by step here:
- First, find a minimum of two stable anchor points. These can be sturdy trees, large boulders, or bollards placed into the large rocks.
- Throw the one end of your static rope around the first anchor point and create a rethreaded figure of 8 knot around it
- Throw a sling around the second anchor point. Attach a Karabiner to it then use a clove hitch to attach the rope to the karabiner. Adjust the clove hitch so that there is enough of a ‘U’ shape in the rope that the apex will sit just over the edge of the cliff.
- Tie a figure of 8 knot on the bite in the apex of the ‘U’ shape
- Place two separate karabiners into the knot, with both of the locking mechanisms facing opposite directions and have them facing the direction of gravity.
- Thread your climbing rope through the two karabiners, lock them off, and you are ready to climb.
*note: additional anchor points can be added by manipulating the rope in various directions.
Preparing the climber and belayer.
The climber attaches themselves to the harness using a rethreaded figure of 8 knot. This knot is used due to its simplicity, ease of use, ability to be checked and strength. Once the knot is tied, check that enough rope is left at the end of the knot, tie a stopper knot if necessary, and wait for the belayer’s call to start climbing.
The belayer places a Karabiner through their belay loop with an ATC belay device threaded through this Karabiner. The rope is then passed through both the ATC and the Karabiner in a neat manner ensuring that the rope is not tangled and moves smoothly.
Once both the climber and belayer are ready, they check each other, and the climbing can begin.
When you are climbing…
Remember to use both your hands and your feet. Your feet move you up the wall and your hands keep your body on the wall.
Keep your hips close to the wall to improve your balance and stability. This creates less work for you arms as all your weight is placed on your feet.
Try and manipulate your centre of mass to lever yourself up the wall. Create less work for your arms.
If your arms begin to get sore, focus on locking your elbows straight, and think about where you are going to place your feet rather than your hands.
Cycling
Cycling is a high energy demand activity that requires both extreme physical and mental fitness. Although cycling and riding bikes is one of the first main skills we learn as a child, when cycling long distances on roads and highways in groups, many safety considerations must be heeded to.
Safety considerations when cycling
- Always wear a helmet when cycling. Being in an accident with a helmet significantly

- Kevin demonstrating how not to appropriately wear a helmet -
increases your chances of avoiding brain injury or other problems so a helmet is vital.
- Perform a complete and thorough check of the bike before leaving; damages, tyres, brakes, gears etc
- Ride in groups to ensure no one becomes lost or in trouble when an accident occurs. Riders can become easily separated when cycling long distances so ensure that you either ride together at all times or create short checkpoints on a map for everyone to reach.
- Ensure that you pack all the necessary equipment. The items you would carry for a day trip in the summer, i.e. map and compass, first aid kit, nutrition, extra clothes, should always be brought along with a bike repair kit, mobile phone and other items specific to cycling.

Other Considerations to be made
- Use the gears on the bike to your advantage. Constantly change gears to suit your speed, incline or decline, to make it an easier and more comfortable ride for yourself.
- The seat should be adjusted so that it is just under the hip line when standing next to the bike.
- When you are sitting and peddling on the bike, there should be a slight bend in your knee when the peddle reaches 6 o’clock.
- Always be open to the needs and feelings of the entire group. Stay together as much as possible and you are only as fast as the slowest group member.
Overall many things were learnt from this trip, new experiences were made and a greater understanding in many areas has been achieved. The trip was a tiring trip but very worthwhile and was certainly a trip to remember.