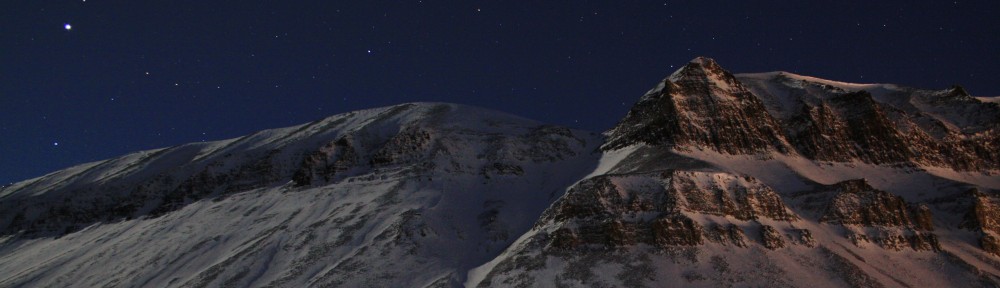
The ski trip took place at TrollActiv; close to Evje which is roughly 70km from Kristiansand. We used the surrounding mountain area as a place to learn and develop our basic ski technique. Throughout the week we learned how to move around on cross country skis such as turning when stationary and when moving, preparing skis before a tour, first aid and what to pack in a day pack. As well as this, the week also provided us with experience in navigating in snow shoes and through snow using geo – caching and allowed us to snow on old and fresh snow in varying temperatures, allowing us to experience different ski conditions and how this can affect your skiing.

The outdoor recreation act
With regards to the Outdoor Recreation Act we are allowed to travel over cultivated land. This is because skiing is a winter sport and a non-motorized activity, so the ground is frozen and hard to destroy. This gives skiers more allowances with where you are permitted to ski. Of course, some lands are still out of bounds. The basic points of the act still apply that you should leave nothing but footprints, allowing others to enjoy nature as you have.
Ski preparation
Over the course of the week ski preparation was learned – we applied ski preparation to telemark touring skis which we were given for the trip. Ski preparation is very important as picking the right wax and applying it correctly determines how fun and easy a ski session may be. If wax has been applied correctly, the results should be that you glide when you want, but also have enough grip to push off and move.
Wax is used on the bottom of the skis to help the ski glide. If there is no wax, the fibres in the skis become rough and slow the skis down making it difficult to glide and pick up speed. When picking wax, the temperature needs to be taken note of. In warmer temperatures a softer wax is needed as it is more likely the ice crystals will stick to a harder wax subsequently slowing you down. And so in colder weather a harder wax is needed. When it comes to waxing your skis a base wax or glide wax is needed, similarly harder wax such a green can be used and this is applied over the whole length of the ski. Only a thin layer is needed. Grip wax then needs to be applied but only in the kick zone. This is where your weight is at its most – in the middle third of the ski. Between 1 – 5 layers should be applied to this area which will give you grip when you push off. As each layer is applied rub the wax in with a cork to achieve a smooth bottom. When all layers are applied the ski should look and feel smooth and you should not be able to see chunks of wax on the ski. When waxing skis for the first time it may become trial and error. If the wax isn’t gripping but is the right temperature, your kick zone may need to be lengthened. Similarly you can mix two waxes together to achieve the grip you need. This is done by rubbing the wax in a circular motion. Knowing the length of your journey will also determine how many layers of wax you need as the longer the journey – the more layers needed. It is also easier to use wax in warmer conditions as the wax is softer to apply and rub into the skis. Alternatively you can use skins instead of wax which make it easier when traveling uphill as there is no need to heron bone or side step, but still provides enough glide to go downhill. These are good for beginners as they stop you from going too fast downhill. Not only are skins an option but klister can be used too. This is a glue like substance used in very bad conditions where the snow may be old or very icy. A problem with the solution is that is an become sticky and is hard to remove.

At the beginning of the trip the ski individual components of a cross country ski were explained. The skis we were using had steel edges which help cut through ice and makes going through downhill easier. The ski is also narrow in the middle which makes is slightly easier for turning and a long indent thought the length of the ski to help maintain a straight line when going uphill. There is also a considerable amount of camber in the ski around the kick zone. The kick zone will only touch the ground when all weight on one foot is put on to it. This allows grip when shifting weight from foot to foot to push off on the snow. This area is also known as the grip zone and is why you put grip wax on this particular area.

Technique

Balance
The basic ski techniques were taught to us first which included balance, turning, gliding and breaking. Balance is an essential technique to have with skiing and if you don’t possess such skill it can become very difficult to master skiing as experienced! In order to gain good balance, good posture is needed. This can be achieved by bending the knees in line with your toes, this also means bent ankles. Hips should be forward and so should hands for balance. Once you have achieved this posture, your weight can be transferred through each leg as the conditions changes. Some of the activities that helped focus on balance were skiing without sticks, skiing down a gentle slope and crouching up and down, shifting your weight onto each ski so skiing on legged. Throughout the week our balance was tested with a series of fun activities. These included organ peddling, small man made humps, jumps etc. These helped to focus on continually shifting your weight to keep yourself from falling.
This is what happens when you have awful balance:

Breaking
Breaking was learned at the beginning of the week and is seen as an essential technique is order to stop when you want so you are in control of your skis. We learned to stop by snow ploughing. We did this on a gentle sloped and practiced slowing down and stopping completely on a slope. One method in which we learned is for someone to shout ‘stop’ and ‘go’ while on a slope and the skier is to follow those instructions. A more advance technique is to parallel stop by using the edges of the skis and turning to the side.
Gliding
Gliding make the process of skiing very enjoyable. If gliding is hard it can become difficult to move and hard to enjoy. This requires a level of balance but in order to glide one pushes off the ground while the other glides. This is aided by your sticks which help push you forward. You skis however do not need to lift the ground and a lot of arm work is needed when gliding. In order to understand the concept of gliding you can experiment with your gear by using your sticks at the same time or alternatively etc.
Turning
When turning your skis, you can use different techniques to accomplish this. As a beginner you can use the snow plough technique to low yourself down and shift your weight on each ski which will cause the skis to turn. Once this is accomplished you can try parallel turning which involves starting as a snowplough and lifting the uphill ski up bringing it down parallel with the downhill ski which causes you to turn. Once again this requires a high degree of balance.
Heronboning
Heronboning is another technique used when getting up the hill. In order to achieve this you must form your skis in a ‘v’ shape with the tip and part and the tails together. A small ‘v’ for gentle hills and a wide ‘v’ for steeper hills. The grip then comes from edging our skis which is done by rolling the ankles and knees into each other. Short steps are often the most efficient, just enough to step over the other ski and always use your sticks by placing them behind you whilst pushing you up the hill.
Rucksack packing

Over the course of the week we also learned how and what to pack in your daysack. This is what is to be taken with you:
A dry bag – this ensures all gear stays dry. A plastic bag can also be used as a cheap alternative.
A shovel – this is essential when navigating in thick snow and helps you move through the snow or create fun activities as we experienced.
A spare hat, buff, gloves – Is should be assumed that your warm kit may get wet, especially if you are a beginner and so a spare set of kit should be taken to maintain warmth. Snow goggles are also ueful as it I near impossible to see in snowy conditions.
Wax – if you have no wax and gliding or gripping become hard you will find skiing incredibly difficult and energy consuming and so should always have wax with you
Map and compass – this is an essential tool in stopping you from getting lost.
Knife – A useful tool to have no matter what you’re doing in the mountains
Rope- A piece of kit that can help temporarily fix broken binding and such.
Personal first aid kit – If injuries occur you are ready to deal with them
Avalanche probe- the area you are in may not be avalanche prone so always check before hand and if so take one.
Role mat/seat – This is useful when stopping for a rest or if there is an accident. It should also be decided that a member of the group takes a sleeping bag in case of emergencies. An emergency group shelter is also a useful piece of kit to take.
First aid

You should always be prepared for an accident to happen. When skiing, cold weather injuries are most common and so the group should take extra attention in spotting if a fellow group member is suffering from frostbite, hypothermia, etc.
Before making a journey always make sure your first aid kit is fully stocked up. The items that should be included are:
Gloves, face mask, tissues – these prevent the first aider from any disease/infection the casualty may have
Splint – one that can be moulded and can be used in a number of different ways.
Tape – This can be used to secure a splint, bandage and stop blisters occurring.
Rescue blanket – this can be used to keep he casualty warm if suffering from cold weather injuries or just in general
Pen and paper – this is handy as you can note the casualty’s health and progression while waiting for the emergency service.
When treating injuries such as hypothermia it is essential they are sheltered from the elements. Encourage exercise to generate heat and keep them warm with hot drinks and food. If hypothermia is worse and the casualty isn’t shivering they are becoming very vulnerable as their body as stopped trying to keep them warm and so the casualty should be laid horizontally and their airways kept clear. Evacuation is of high priority.
Signs of hypothermia are:
- Shivering and pale, cold dry skin
- Disorientation
- Lethargy
- Shallow and slow breathing
- Slow and weakened pulse
Frostbite is also a common cold weather injury. The first stage of this is frostnip, but if left untreated for 30 minutes it can quickly become frostbite. In order to treat frostnip local warming is needed such as fingers, armpits, hands, thighs etc. If the infected area becomes frostbite it can result in a painful recovery and possible loss of tissue. You should not rub the infected area but dry it and not try to rewarm it. If waiting for evacuation you should treat the casualty as if they have hypothermia to maintain their heat.
References
Langmuir, E. (2013) Mountain craft and Leadership. 4th edition. England, Mountain Training Scotland and Mountain Training England.
St Johns Ambulance. (2012) Hypothermia. [Online] Available from: https://www.sja.org.uk/sja/first-aid-advice/effects-of-heat-and-cold/hypothermia.aspx [Accessed 1st June 2014].
Cross country skiing, information, advice and technique. (2010) Herringbone. [Online] Available from: http://www.skixc.com/survival-2-4.html [Accessed 1st June 2014].
Government.NO (1996) Act of 28 June 1957 No.16 Relating to Outdoor Recreation [Online] Svailable from: http://www.regjeringen.no/en/doc/laws/acts/outdoor-recreation-act.html?id=172932 [Accessed 26th February 2014].