It was not clear until the start, if we would have enough snow for the big snowholing event. The action everyone was looking forward to. The temperatures had increased and our beloved snow was melting away.. We changed the location for the trip and fortunately, there was still enough white snow in Ljosland.
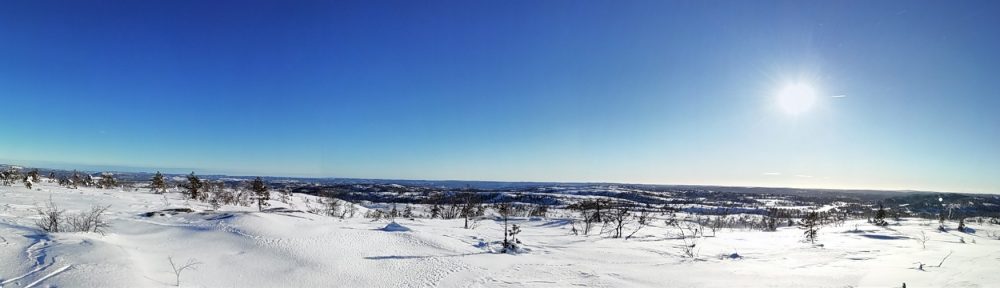
 The first day, was more a travelling and arrival day. We skied a few kilometers to the hut Lakkenstova, enjoyed the sun, struggeled with the wax, setteled down and played around in the area close to the hut looking out for an appropriate place to dig a snowhole. What is required for such a place?

- It must be deep enough (at least 3m, vertical & horizontal) – Check with the avalanche probe
- Rather high, that new snow doesn’t pile up in front of the “door”
- Steep section, that we can dig in
- Rather north facing slope, because of more snow
It was a fun day and we tested different areas with the avalanche probe to find deep enough sections. But the other group had more luck. They detected the perfect spot for snowholing: A wide, steep wall, that offered enough place for five holes. Everyone was excited to start and looking forward to the next day.
But that night, we still had to sleep in the hut. It was a big hut and offered mattress on the floor for at least 20 persons.The most huts offer gas and wood to burn, but no water. So was this one.


A few of us went down to the lake and tried to make a waterhole to deliver water. Therefore we screwed a hole in the ice, that sounded easier than it was. The ice was very thick and it took a while til we could bucket water out of it. The hut provided a nice cosy atmosphere with a fire and candles and we played cards till the eyelids dropped.
 The program of the second day was known: digging, sawing, constructing.
Everyone was dressed in their waterproofed clothes as we would crawl, sit and lay the whole day in the snow. But it was a nice day. Little wind, a lot of sun and blue sky. Nobody felt cold, it was rather hard work and kept us bussy five hours.
I started to built my first snowhole with Bec and Sophie. Girls power! The first steps were to dig in a narrow (shoulder wide only) but tall (tallest person in the snowhole) entrance straight into the snow wall and leave 1m spare snow between ceiling and surface, that it would be stabil enough. Therefore, we took turns  and shoveled and carried the snow out of the way. When we made it inside, we started digging to the sides. Next to the narrow floor should be formed the beds on hip height. Wide enough for two persons to ly in and high enough to touch the ceiling with a streched arm in a lying position. It’s important to check the wall from time to time and have a reference point to judge if it’s dropping down. In this connection we used the saw to cut big snow blocks out. Those were needed in the end to close the entrance. Not finished yet, but it was already so impressive how stabil the snow was and that our construction was formed more and more into a hole with beds.

Before it was completed, I changed groups and helped building another snowhole. They needed my constructing knowledge 😉 Actually it had very simple reasons. We were offered to bring a tarp with us, that we can ly on it and shelter our sleepingbags and ourselves better from the snow around. I was sharing a tarp with Jonas. And Jonas was building a different snowhole.. So I moved and built new beds. After the rough work, came the finishing touch.
- Plane and round the ceiling, because it will drop at the lowest point.
- Plane the beds to improve the sleep.
- Lower the floor, that we can stand upright.
- Lower the whole floor on the way out, that the cold air can flow out and won’t stay in.
- Close the entrance: Arrange one large snow bloc vertikal. Then dig a small hole into the side wall and arrange another one horizontal above the vertikal one and fix it in the hole. Set more blocs on top of it. And leave only the small hole next to the vertical bloc free for the entrance to crawl in. It can be blocked at nighttime by a backpack.
- At last stick a pole through the closed bloc wall, that air can circulate.
- There must be two avalanche probes set up next to the entrance of each snowhole. So, that people can be finde in case of a lot new snow over night.


As everthing was done, we were exhausted and curious to move in. The first night in our own built snowhole. What an experience. It’s been a warm day without minus degrees and due to be a mild night as well. So it was not cold anyway. But should the temperatures drop down below zero, it would still stay around 0°/+1° inside the snowhole. So we were looking into a cosy night.
And so it was. We all got a good, warm sleep and most of our group woke up in their hole without any issues. But some of us faced a down coming ceiling. Two out of five snowholes got instabil during the night, and their ceiling dropped a little. No one really understood why but reasons could had been the warm temperatures or too little space between ceiling and surface. The coaches wanted to wait till this evening to make further decisions.
 The third day was a skiing day. We should improve our orienteering skills, get more used to measurements like stopping the time and learn more about avalanches and snow profile. In a small group we went on our day tour with Tim. We took turns in leading the group through the snow to a specific destination. The task included to inform the group about distance and time and then choose the easiest and safest and especially the right way to get there (fact: 3km per hour, + 1min per 10highmeter). We learned to be precise and to check our environment attentive for recognisable features. We took bearings on our maps and on the field and improved our naviagtion skills.
In the afternoon we stopped at a south facing, steep slope and tried to set an avalanche risk for this section.  Therefore, Tim digged a hole and set free a 1m snow wall to analyse. We could already identify different layers, as texture and colours variied. Tim made the different soft and hard parts of the wall clearer by pushing into the snow with the hand or using a knife cutting through the different sections. Putting a pole into the middle of the snow bloc and pulling on a rope that is going around the pole to the corners of the wall, Tim tried to cut the bloc and see if a snow layer would descend. But nothing happened. Next, we exposed the snow layers to pressure and weight. Bec crossed the bloc on her skis. But again, nothing happened.

Only when Bec jumped exactly on it, a layer moved and parts of the bloc came into movements as well. Kind of an avalanche. But in total it was more stabil than expected. Refering to the avalanche risk levels, we decided to give this slope a moderate number 2.
- 30° steep
- different layers (soft, soft, hard, soft, hard,..)
- stabil by crossing with skis
- avalanche trigger by a jump (high pressure)
It was a hard working day with a lot of highs to go up and down again. And when we came back to the snowhole camp I was only looking forward to dinner and sleep. But instead of having a nice comfortable evening, we had to look after a new sleeping place. A few snowholes turned into unsleepable accommodations, because the ceiling droped even more during the day and it was too dangerouse to stay in there. The one and only solution was to put our strengths together and built new homes.

Emergency shelters: Quick and small but safe and warm. In pairs we looked around for good spots, constructed plans and started showeling again. I felt tired and hungry and had a big headache. And my partner, Michael, looked even worse: Tired eyes, headache as well, .. In short, the motivation was low and the task to built another snowhome after that day was quite hard. We offered each other breaks, fed us with snacks and worked another two hours to have something to sleep in.

- Find a more or less steep area (1m high).
- Mark the entrance (only shoulder-width) with two avalanche probes.

- Start shovelling and sawing to set free a narrow (shoulder-width) floor, that is 1m deap, has an open roof and is as long as the tallest person sleeping in the shelter.
- Keep the snow blocs to close the roof and the entrance later
- Cave to the right and to the left at the bottom of the floor to creat a kind of a mushroom. It should be just big enough to lie underneath.
- Close the entrance: One big snow bloc upright, another one across on top fixed by the sidewall. Then build the other ones on top and stuff holes with extra snow.
- Lay skies and poles across over the open narrow floor and pull the tarp over it to close the roof. Fix the tarp with big snow blocs in each corner and then around the edges. To ballast the tarp, put some loose snow on top.
Our emergency shelter had just enough space for the two of us. That’s how it should be like, to avoid room for cold air. But it was so tight. Especially the go-to- bed-procedure and the get-up in the morning was very funny and needed some acrobatics. The night itself was okay. It was surprisingly not cold and we had a good sheltered place. But unfortunately my head couldn’t stop worrying about the close snow wall above me. I was awake a lot of times, that made it not a really relaxing night for myself.
 I was quite happy to crawl out of the shelter the next morning. When everything was packed the groups headed of to a last skiing day with another training session for navigation. During my turns I learned to choose good view points when stopping to orientate. Moreover I learned to take a bearing from the map:
- Orientate map
- Draw a line between the current position and the place you want to go with the edge of the compass. Travel arrow should point in the general direction you want to go.
- Rotate the bezel till the orienting lines on the compass are aligned with the north- south grid lines and the north marker is pointing north.
- The index line shows the bearing
- Hold the compass straight and turn your body till the needle is inside the orienting arrow. The travel arrow shows the direction of the place you want to go.
- It’s useful to choose a checkpoints in visual range and kontroll the direction again.
Another lecture of the day was to simulate an emergency: Ruaridh didn’t feel good and complained about being cold. He started talking crap and wanted even to get rid of clothes. That’s very typical for a hypothermia. So we started reacting:
- We packed out the emergency shelter (it’s useful to know how carrys the shelter) and laid Ruaridh on a backpack inside the shelter.
- We stopped him from undressing and wrapped him in more clothes (sleeping bag also possible).
- We gave him a warm drink and a snack to eat.
- We continued speaking to him to check his state.
It got worse and he passed out. But he was still breathing. The phones couldn’t get a connection to get help.
- Ruaridh didn’t react to voice or touch, but he was still breathing.
- We wrapped him in a sleeping bag (another person can go inside as well to warm him up with body heat) to keep him warm and rolled him in a stabil position.
- We watched him attentively, that he wouldn’t throw up and choke.
- We wrote down a list with informations:
What happened?
What was already done about it?
Current state?
Where? (Coordinates)
How many people are involved? Age?
Group knowledge?
Weather conditions?
Gear (also, how much food/water left)?
Environment/terrain: Possibilities to land the helicopter? - The best navigators were sent off with the list to get help (It shoud be a group of 3 people, that in case of another emergency one person can stay with the injured one and the other one can call for help. It’s also important that those people carry their backpacks (food, sleepingbags, first aid kit,…) with them.
Ruaridh recovered as by a miracle 🙂
The role play was realistic and therefore very helpful and impressive.
The trip ended this day after lunchtime, one day earlier as it was planned. I would have liked to stay a second night in the cosy snowhole as it was envisaged. But since some snowholes had been close to colapse, it was a pleasure to experience that at least for one night. The emergency shelter was a tough number but totally worth the stress and I am glad that we had had the possiblity as well. I learned a lot this trip and I am actually looking forward to make use of it. But it’s getting warmer and warmer…
