Final Ski Tour and Mountain Safety Trip
Aim-Improve ski technique, learn how to dig a snowhole for sleep and avalanche testing and identification.
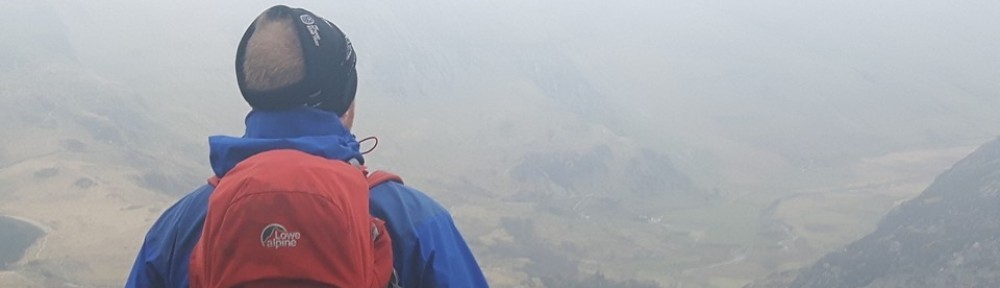
The aim of the snowhole trip was to once again further our ski technique and ability and introduce us to snowhole and avalanche safety. It was for 4 days in the Berg and Stavskar area. We were split in two groups, a confident and development group as we liked to put it. The week was very informative and increased my mountain knowledge significantly in a winter environment and laid the knowledge for my future career. We lived out of a snowhole for 3 days which was a unique and fun experience. This definitely was my favourite trip.
Day 1
Day 1 mainly consisted of skiing to the first base/hut which was Stavskar. The route to the hut wasn’t massively strenuous however for several members of the team it was. The temperature was roughly around -15 with winds of 12m/s. Alone these conditions are a challenge for most people, that why it’s important to equip yourself properly with the right clothing and gear that can protect yourself for several days. Jonas (2009) further this by stating how to equip yourself properly, picking the right equipment to prevent disastrous results. Each member of the team took a leg of the navigating. The navigation wasn’t so harder as most of the route was marked by sticks but there were sections where better alternatives routes could have been chosen. During the first leg, which led by Kyle, the group had already taken the wrong route. This was same for the other group and commonly found in navigation situations, most people follow in a sheep-like manner. This could have been the case in Kyle situation, following the other group as they were taking the same route. Once the error was corrected the rest of the tour was smooth and hardly any complications. My turn to navigate was towards the end of the day and was to get us to the hut. By this point I felt strong in my ski ability and navigation however I had to be reminded that not everyone was going at my pace and I had to take into consideration other people’s abilities. I took the decision to put the slowest person at the front, thus we go at a slower pace however we would remain as a collective. Once we reached the base/hut we set up camp for the night. My team decided upon taking jus the outer tent and a tarp to sleep on as it would mean less weight and more convenient. Whilst setting up our tent we dug a cold air well to provide circulation whilst in the tent. This dug well to provide the best amount of circulation. From day 1 I learned that as a leader you must put the groups needs first and your only as strong as your weakest person and that don’t cut corners on setting up your camp and make sure its strong and stable.
Day 2
Day 2 was a day of disappointment and hardwork. Both groups were destined to reach Bossbu, however this was not the case and had to make alternative plans. Both groups set off from the Stavskar hut and the first obstacle was a steep incline up the mountains. Myself and three others were leading my group but it was evident that other 4 in the group were struggling to make it with the incline just getting steeper. As a group, we took the decision to stay and workout of Stavskar and the surrounding area. This was disappointment for myself and several others who wanted to make it to Bossbu and get the full experience of the trip pushing ourselves. Once back at camp we set about digging our snowholes for the next 2 days. The process was longsome process that requires a bit of patience and percvience. We worked in teams of two switching every 40 mins. Myself and Phil took the first shift which was to dig 3m/10ft into the snow to make the foundations and the main channel. The process was becoming frustrating as some people were working more than others and with the weather conditions with high winds from the East it was fully waterproof gear with ski googles. After about 5-6 hrs. the snowhole was complete which then need to be touched up, as we learnt from the first night that the channel at the front was and roof were not filled in which caused a lot of snow to fill the snowhole. The following morning, we amended this infrastructure failure. This is a great example of learning from your failures and learning for next time as no one wanted to wake up to being covered in snow again. WikiHow (2017) provides a structed process on how to build an effective snow, with diagrams for reference.
Day 3
The focus of day 3 was to improve skiing technique, embark on a small tour and test and learn about avalanches control. The day started off with short ski around the hut area looking at avalanches that fallen from high gullies in the mountains. We learnt that the avalanche zone is between 15-40˚ on a slope or mountain side. This put into perspective how much care you should take whilst participating in sports such as skiing and winter mountaineering. As we explored the area we came across several examples of breakage in the snow where the snowpack is weak due to the many layer which then trigger avalanches due to weight of the snow or melting by the sun. Whilst on the ski we encounter a Rock ptarmigan. They are species of bird that is related closely related to the chicken and pheasant. It was cool seeing one of these creatures in it natural habit and we were able to get close to it for a closer inspection. We also saw fox tracks and hare tracks which implicate that there was chase of some kind and the hare outsmart the fox. We also practiced our Telemark stance which was good to get the practice in considering it was our last skiing opportunity. Later in the afternoon we embarked on a short tour NE of our camp with the aim of pact testing the snow, observing the different layers and how the strong the snow is. This is called snow profiling. The procedure consists of cutting blocks of snow using a snow shovel, creating 3 blocks to assess if it is avalanche prone. There 3 ways of testing using the snow shovel- from the wrist, elbow and shoulder, hitting down on it to see if breaks or holds its form. This was an interesting mini lecture and will be useful in my future career. The national avalanche centre (2017) provides information and instruction on how to effectively carry out a snow profile and all the techniques you need to know. The night was a lot more comfortable as we extended our access tunnel and filled in the cracks in the roof, however some members slept in a small hut which defeated the objective of the trip,
Day 4
The final day consisted of practicing ski technique on high inclines and trying perfect the Telemark turn which was still a problem for myself, however as the session progressed it became more fluid and confidence was high. By the time we had finished skiing the other group had returned from this trip and both groups headed out from Stavskar with the premise of sleeping in an emergency bivi. The return journey took a while due to the downhill phases and some members struggled with their downhill technique. Towards the end it did become quite tiresome and frustrating. Once we reached the site for the emergency bivi’s it was all system go as the sun was setting and it would become darker with 30 mins. Myself and George paired up and decided upon a foxhole design, with one opening and was situated half metre below the snow which would provide good cover. We used the skis a roofing solutions and placed branches and snowpack to provide insulation. Skill survival (2017) offer insight on hot build an effective emergency shelter and support my point of providing enough insulation and protection from the elements. We inspected the other shelters and some were questionable to how long you could survive in one. It was then we were told we would not be sleeping in them that and would be returning to Kristiansand. I was slightly disappointed as I wanted to test out my shelter however some members were ready to finish the trip and it was the best option.
The snow hole trip taught me some valuable knowledge which will be used for future adventures and that I believe that for future reference that people should be assessed on their abilities and the groups sorted accordingly as myself and several others wanted to take full advantage of the trip however this was not the case unfortunately and can hind progression.
References
Jonas, S., 2009. Technique and Equipment. ACSM’s Exercise is Medicine: A Clinician’s Guide to Exercise Prescription, p.181.
wikiHow. (2017). How to Build a Snow Cave. [online] Available at: http://www.wikihow.com/Build-a-Snow-Cave [Accessed 11 Jun. 2017].
national avalanche center. (2017). Snowpit. [online] Available at: http://www.fsavalanche.org/snowpit/ [Accessed 11 Jun. 2017].
Jack, J., Jack, J. and Jack, J. (2017). 10 Simple Survival Shelters That Will Conquer The Elements. [online] Skilled Survival. Available at: http://www.skilledsurvival.com/survival-shelters/ [Accessed 11 Jun. 2017].