Basic ski course 6.2. – 10.2.17
Our basic course took place in TrollAktiv AS Syrtveit 4, 4735 Evje. We were worried about snow condition but eventually we had a lot of snow :). We lived in two cabins (“girls cabin and boys cabin” :))
First day on the ski – we were divided into two groups Len’s and Tim’s group. I was in the Len’s group. In the first day we tried some basic exercise on the ski mainly for to find your balance (create flower by snow tracks, stay on one leg, squat, “treading”) Many from our group were on the ski first time.
Second day – We continued in more practice ski. We tried downhill on the ski, go up, squat during ride and touched your heels at the same time (competition – who make more times):). In the end this day we enjoyed a lot of fun – We only played on the ski as a child but I still love it :D. We make train on the ski, slalom, snow fight and very funny position was which Tim showed us…I called it (it’s a secret…I can’t mention it here :D)
Third day – we less practice ski technique but we increase distance on the ski. I liked this… Sometimes I felt as an explorer in the expedition :D…because we made own track…I enjoyed this 🙂 On the other hand I think (realized) that some people from our group didn’t enjoyed. Sometimes Ii was really a lot of snow – movement in this condition was very difficult and for people who stayed first time on the ski it had to be very difficult. So sometimes I tried to explain how use the ski but in English it wasn’t easy – so I had to use mainly demonstration. Our ski trip we finished by jumping on the ski it was fun 🙂
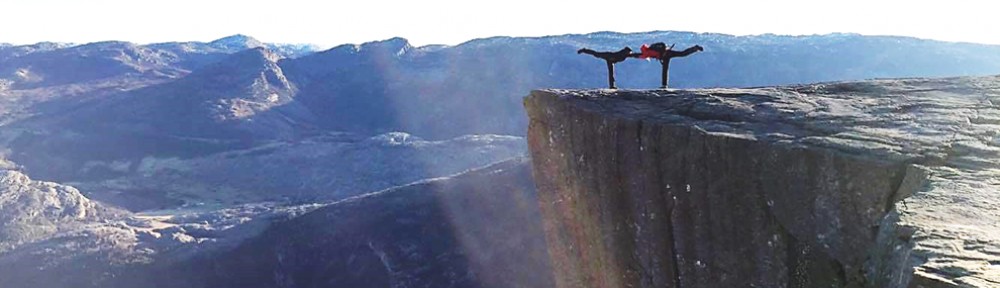
Fourth day – This time Tim was leader our group. We again increased distance on the ski. In addition, we had to use the map and navigate our group. Next we had to estimate time and distance from one point to other point. I realized how difficult is to orientate when snow is everywhere… We counted our average speed ca. 3 km/hod (1 km about 20 minute) but it depends on profile of terrain, skills, snow. We moved more time in the deep snow in free terrain – I liked when we had own track 🙂 and we wandered nature. This time we had a goal and both group met at the top of hill where we made common pictures 😉 Way back was without complication for us, sometimes we tried telemark during downhill but I think that everybody fell down :D. Tim said us useful information about” avalanche (two sides, safety place where trees are); lake – danger where stream is…” This day we finished by downhill, learning telemark and competition in the slalom – it was fun. 😉
Evening
In the evening every country should prepared traditional game, song, dance. Me and Eva chose Czech traditional dance -“Polka” and song “Kozel”. And I think that our everybody learnt this :D. Australia (had dance around firepalce), Switzerland (how make Swiss cheese), England (splash – it was new game for me 🙂 we made circle and Jorge showed on somebody, this person had to make squat and people next to him/her had to as quickly as possible say “splash” to each other. If one of them was faster than second “fell out” from the game; Finland (Gold gate) ; Germany 1 (blink killer); Germany 1 (blind dog had to find chocolate under bell by navigation his owners)
– For me this course wasn’t difficult. On the other hand I realised that for many students from our group it was difficult and sometimes really challenge (mainly for people who stayed on the ski first time) because movement in the deep snow is difficult.
– I refreshed some information about ski – type (skating, classic, touring), wax to ski (how, type of wax- blue, red, …)
Main points:
Some useful (and sth new) information from lectures for future:
- Daily bag should be (20-35 l) and should have – hip bell, ventilation system (back), top pocket – possible to remove it, dry sack (waterproof), compression strips, good carry system
- Take with you: snow shuttle (avalanche, shelter), “group shelter “(protect again wind, nylon),”ski strips”, FIK, repair kid, sth for sitting (sleeping pad), hot liquid, snack, food (enjoy eating, recycle bag), bivivak(keep dry, pack really small), waxes, WOOL (if wet keep warm!), spare clothes (gloves/mints, socks, hat – different material, water+ windproofclothes (GORETEX…), buff), ski goggles, sunglasses (snow blind, snowstorm!!!), MAP, COMPASS, head torch battery… You don’t take stuff only for you – It’s possible use it as emergency stuff for people from your group…
- Easy to find – In your pocket should be: sun cream, snack, map, ski wax (keep warm), telephone (keep warm battery), drink
- FIK = First aid kit: sport tape, plasters, antiseptic cream, bandage, cotton wool (TAMPON- stop haemorrage, pain killers (help with inflammation for ex. ibuprofen, paralen), needle, (minerals), resuscitation mask, safety pins, wire, tablet (diarrhoea)
- Danger: – hypothermia (behaviour!, COMMUNICATION); frost nip (freezing of tip layers of skin tissue; pinch – still white place; initial stages of frostbit); frostbite(touch – still white; no feeling…..WARM very slowly(gradually)! temperature as a body 37°C…..”clean, warm, rest”….how to avoid: DRY!, keep moving, WOOL socks, bigger boots; cut (clean, leave); deeper cut (clean, plaster or butterfly clip bandage; you can use tape; protect, compression, elevation, rest); break (stabilize,”move back”); snow blind (always ski goggles), CPR (before check situation; reaction; pain stimuli; free airways; check breath; call (112); CPR 30:2
- Type of snow (3 factors: water in atmosphere, temperature, wind)
- How to wax ski – from tip to end; remove old wax, clean (brush, nylon), glide wax (skating only), 2 layers wax (depend on temperature), area for waxing – stay on the ski and move the paper under the ski – where it’s possible to move paper = area for waxing – you wax. You can use blue wax (minus zero) and on this put red wax (zero to upper zero) (BUT not opposite).
Care about your group (OBSERVE, ASK, COMMUNICATE); your stuff in you bag isn’t only for you but it can be use as a rescue for others; observe very carefully environment, make more often but short breaks, avoid wet – frozen; plan your way (distance, time, way, place, break); watch your time during way; nylon group shelter is useful; for your orientation you can use sun, wind…
Classic Cross Country Skiing (in english :))
- Practice on a prepared trail.
- Get in the right stance – Stand on flat ground with your skis parallel to each other. Bend forward at the ankles, and slightly at your knees. Keep your torso straight, not bending at the hips.This position helps keep you balanced, with your weight over your feet.
- Shuffle your skis forward until you can move comfortably – Scoot one ski at a time slightly forward, getting a feel for the amount of force you can apply without losing your balance or bending above the hips. It takes significant leg strength to turn this shuffling motion into the “kick and glide” motion described below.
- Learn how to get up from a fall – Set the poles aside after a fall. Adjust your skis so they are parallel to each other, rolling onto your back if necessary to get them untangled. Place the skis onto the snow, to one side of your body, and crawl forward until your feet are behind you. Kneel on top of the skis, and use your poles to push yourself up. If you fall on a hillside, raise your skis in the air and bring them down on the slope below you to get in a more stable position. Crawl to a flat area before you stand up. Keep the skis to one side as you crawl, not directly beneath you, or your weight could push them down the hill.
- Practice the kick-glide movement without ski poles – Leave your ski poles aside for the moment, so you can practice this new motion without relying on your arm strength. Push your right foot down into the snow to get moving, swinging your right arm forward and your left arm back. Immediately shift your weight over your left ski and raise your right ski slightly above the track, gliding forward with your right ski trailing behind you. Return your right foot beneath you, then push off with your left foot and glide on your right ski. Alternate between feet to continue moving. Try to find a rhythm where your legs alternate in even strides as your hips adjust your weight from side to side.
- – Push down into the snow with a slightly forward stride, not with a backward kick.
- – Relax your body while you are gliding, keeping your weight slightly forward to keep your momentum.
- – This can be exhausting and difficult for a beginning skier. If you get tired, take a break or return to the shuffling motion for a while.
- Kick forward with ski poles – Once the “kick and glide” movement forward feels a little more automatic, pick up the ski poles. Immediately after you kick forward with your right foot, and shift your weight to your left foot, plant your left pole angled backwards and push with it to give your glide extra momentum. Use your right pole to give yourself momentum after a left kick.Plant each pole close to your body, barely extending your arms forward.
- Step up hills – Practice the “herringbone” method of stepping up hills. Point your toes outward to make a “V” shape with the skis behind you, then roll your ankles slightly inward to push the edge of the skis into the snow for a firmer grip.Lift one ski completely off the ground and step forward. Maintain your balance with the ski pole on the same side as the ski with which you are stepping. Alternate with the ski and pole on the other side.
- Glide or step down hills – As a beginner, only glide down gently sloped hills that contain tracks for your skis. Lean further forward over your skis when gliding downhill to avoid falling backward. If you are not comfortable gliding down a particular hill, point the toes of your skis inward in front of you, and angle them so the edge closest to you is digging into the snow. Step down in small steps, keeping your weight back above your feet.
- If you need to stop suddenly halfway down a slope, crouch low to the ground and lean backward, letting your skis slide out from under you. Hold your poles out of the way behind you, where you won’t run over them or fall on top of them

References:
https://en.wikipedia.org/wiki/Frostbite
https://nsidc.org/cryosphere/snow/science/types.html
http://www.wikihow.com/Cross-Country-Ski


