BASIC SKI COURSE 3/2/20 – 7/2/20
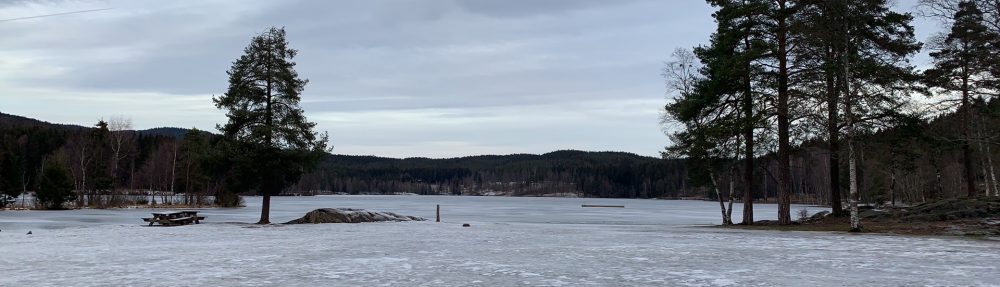
The basic ski course, which ran from Monday the 3rd of February to Friday the 7th of February saw the 2020 Friluftsliv class head up north to TrollActiv, in Evje, to learn to master the skills associated with cross-country skiing. Upon arrival at TrollActiv at 10:30am, it started snowing! This was very exciting as I had never been in the snow during fresh snowfall before.
After settling into our accommodation for the week, a brief lecture was given by Tim and Sindre in regard to ski wax and clothing choices for the week. Shortly after, we headed up to Høgås to kick-start the skiing lessons. The class was split into two groups; I was in Tim’s group alongside Stefan, Ho, Caroline, Jella, Michelle, Natalie, Leo and Liam. As Monday was a shorter day in the snow, we only learnt a few basic skills which included balance and heronboning.
Balance Balance is argumentatively one of the most important aspects of cross-country skiing and if you do not possess this skill, it is almost impossible to master the sport of skiing. Good balance can be obtained by flexing the knees and ankles, positioning your hips forwards and using your arms and ski poles to help keep balance. Your weight can also be transferred between each leg to maintain balance as the skiing conditions change. The skill or balance was taught to us on flat ground at first where we learnt to take steps forward and to the side, 90 degree turns and tried jumping up and down on the skis. This activity then progressed to a small downhill section where Tim introduced the next set of skill progressions.
We began skiing down a short, gentle slope first with our feet shoulder width apart. Tim then instructed us to crouch up and down whilst going down this small slope. After falling over a couple of times, we then tried skiing on one leg, and switching the legs whilst going down the slope; this was quite challenging!
Heronboning Whilst working on the same slope, Tim taught us the skill of Heronboning. Heronboning is a skill used to ski/walk up a hill. In order to achieve this skill, you must position your skis in a ‘V’ shape with the tips of the skis apart and the tails together. As this was a gentle hill, the ‘V’ shape was small, however if the slope was to be steeper, a wider ‘V’ shape would have had to been used. The grip to stop us from slipping back down the hill comes from edging our skis into the snow. This is made possible by rolling your knees and ankles into each other. Short steps make heronboning more efficient and your sticks should always be positioned behind or to the side of your skis to assist in pushing yourself up the hill.

On Tuesday we headed back up to Høgås and worked on perfecting our balance and heronboning skills. Tim also taught us how to break by using the Snow Plough (or pizza) technique, Telemark and how to turn whilst in motion.
Breaking Breaking is also considered an important aspect of cross-country skiing as it enables you to be in control of your skis. We were taught to control our speed by using a ‘snow-plough’ technique where your skis are in the shape of a slice of pizza.
Telemark To go into the Telemark position, one leg slides forwards and the knee is bent. The other leg is positioned behind with the heel lifted up and the knee is also bent.
Turning Turning is important for beginner skiers to master as this enables them to be in control of their direction down a hill and avoid other people or obstacles in their path. To turn to the left, you should drop your right shoulder towards the tip of your right ski, while increasing the pressure of your right ski boot on your right ski. This position should be held as you are moving down the hill and then your skis will begin to turn to the left. To turn to the right, repeat these steps, but on the left side of your body.
Shortly after learning these skills, Tim led us on a short tour around Høgås through both piste and off-piste tracks. This tour had both uphill and downhill sections where we could practice all the skills we had learnt so far. I found this tour quite challenging as I kept falling over and my confidence on the skis was decreasing. We headed back to the carpark to have a short lunch break and then headed back onto the piste tracks and learnt how to track ski using a gliding technique.
Gliding This technique makes skiing quite fun and in order to glide, one ski pushes off of the ground whilst the other ski glides. This movement is assisted by using your arms and poles in the opposite direction to your legs. For example, if your right foot is forward, your left pole is forward. Alternatively, you can also use a double pole technique.
Our group raced against each other in the tracks and to my surprise, I went a lot faster than I thought I would. I felt very confident with this skill. Our group also raced against Sindres’ but unfortunately, we lost the race. This was a great activity for group development as there was a lot of verbal encouragement towards teammates.
Following this race, we finished the day on a steep downhill area. The steeper hills were quite fun to test out all of our skills on and to my surprise, I didn’t crash as much as I thought I would! Tim also used our poles to create a Slalom course which we all attempted. Upon reflection, I believe my skiing skills improved rapidly today and I feel more confident going down hills; even if they are small!


Wednesday morning, we headed back to Høgås where we were met by UiA International Staff who were filming our skiing to make a promotional video for the Friluftsliv course. During the filming we focused on performing downhill turns and Telemark. The two skiing groups also came back together for another race, but Tim’s group lost, again!
Following on, Tim took us on another tour of the area; but this time it was mainly through off-piste terrain. All group members had the chance to lead the group and mark the track through the snow. This was quite difficult as the snow conditions were changing and the wax on our skis wasn’t working too well.
After meeting Sindres group and having a shared lunch, we began making fires in the snow. I was excited for this challenge as I was able to use my prior knowledge from other lessons with Len and the Norwegian Frilluftsliv students and put it into practice.
On Thursday we jumped in the bus and drove for nearly an hour up to Bortelid Alpinsenter as the snow conditions were much better up there. The plan for the day was to do a top tour above the ski lifts which meant we had to conquer a 300m ascent up a steep hill. To help with this, we were allowed to use skins on our skis. The skins were very effective and made the ascent seem almost effortless.


Once at the summit, we began learning how to make ski anchors and snow bollards. Sarah and I made a ski anchor and began to dig a hole which was about 50m deep and long enough to fit the pair of skis. Placing the skis in the hole, we then attached a sling and a screw-gate carabiner. The rope was then tied onto the carabiner, by using an Italian hitch, and then placed around our waists by using a figure of eight on the bite. The purpose of this activity was to learn the different approaches you can take when a less confident skier needs to be lowered of a steep descent or cliff. I found this really interesting as I was able to put my rock-climbing knowledge into practice in a different environment.


After a short lunch break, Tim set us the challenge of building a snow shelter which two people had to fit in. Sarah and I dug a small hole in the side of the snow and used our skis as the roof. Although our shelter was not very practical, it was a fun activity and I have observed and learnt different ways in which I could approach this activity another time.

The descent down the hill was very challenging and I crashed many times. As a result, my mood decreased rapidly, and I was getting very frustrated and tired. The terrain was very steep, so Tim made us take off our skis and walk until we reached the piste area. The trails were mainly downhill from here back to the carpark but as I was very tired and exhausted, I kept crashing and had had enough of skiing by this point.
Thursday night saw us all come together for a Ceilidh, which is a traditional Scottish gathering. As instructed by Len, I taught the class a dance we perform in Australia at most social gathering; this dance is called The Nutbush.

Friday was a short day out on the snow, and we used Klister on our skis as the snow in Høgås was old and in an icy condition. We used maps to navigate ourselves around the area and although I thought I was confident when reading a map, I got rather confused and struggled to orientate myself. I am not sure if I was tired or if it was due to the fact that everything looked the same due to the snow. I need to work on this and concentrate better when it comes to our student organised field trips.

LECTURES: The Skis and Wax The bottom of cross-country skis is made out of plastic which creates a pores type condition. This enables other products, such as ski wax, to be absorbed through the bottom of the skis. The bottom of the skis also has a Gemel (or tracking groove) which is a small dent running in a straight line down the middle of the skis. The Gemel assists skiers to ski in a straight line and is only present on cross-country skis. Downhill skis do not have this feature as it restricts turning ability which is an important element to downhill skiing. Alternatively, cross-country skis have a wide tip and tail to assist when making turns.
The purpose of waxing a ski is to help a skier grip and glide across the snow. The wax needs to be applied in three thin layers, corking the wax into the ski between each layer of application. It is important to remember the three-layer principle as this prevents the wax wearing off quicker and is easier to cork in; opposed to applying one thick layer of wax. Furthermore, the wax needs to be applied to the centre third of the ski as this is the grip area and where most of the person’s body weight is applied to the ski. Choosing the correct wax is a crucial aspect of cross-country skiing and choosing the right wax is influenced by the weather and snow conditions.
When it is -15 degrees Celsius, the snow is in the form of Stella Crystals (6-sided snowflakes) which are pointed and sharp, meaning the snow will bite into the wax. As a result, you will need to wax your skis with a hard wax; for example, if there is fresh snow on the ground, a blue wax should be applied to the skis. At -5 degrees Celsius, the snow crystals will start to round and the snow compresses (eg – 20cm of snow will become 10cm of snow). In these conditions, you need to wax your skis with a softer wax; for example, the blue or violet wax. At 0 degrees Celsius, the snow has a lot of moisture and a red wax should be applied to the skis.
A green wax is also recommended as a base layer on the skis. This should be applied two to three times across the whole ski, then followed by the appropriate wax for the chosen weather conditions.
There are multiple alternatives to using ski wax with the first option being skins. These can be used on the skis to assist with uphill ascents however all wax should be removed from the skis before the application of the skins. On the contrary, Klister, which is a very sticky wax, can be applied to the skis and is the best option when the snow is old, when the snow has melted and re-frozen into ice or when the weather is warm, and the snow is wet.
Daysack When day touring, it is important to take a daysack with you containing individual items as well as group items; which are also carried by other group members. When packing your daysack, it is important to check the weather forecast and pack appropriately. Some examples of individual items that are important include:
- Nutrient and energy dense food, as well as snacks to go in your pockets
- First aid kit
- Both hot and cold drinks
- Down jacket
- An extra pair of gloves or mittens
- Sunscreen and lip balm
- Map and compass
- Sunglasses or goggles
- Avalanche equipment (probe and shovel)
- A seat or mat to sit on
- Headtorch
Group items might include:
- Emergency shelter
- Repair kit (containing tape, zip-ties, safety pins, pole sleeves)
- Group first aid kit
- A Trangia or stove
- Ski wax
- Multitool and knife
First aid kits It is important for everyone to carry their own first aid kits and are necessary in the field to treat minor injuries, medical illness and provide preventative measures to serious injuries before professional medical assistance can be seeked. First aid kits can also come in handy for fixing tents, sleeping bags and skiing poles, just to name a few. A personal first aid should contain the following items:
- Sports tape
- Compression bandages
- Tweezers
- Bandaids
- Panadol (remember to check the expiry date)
- Antiseptic wipes
- Safety bandages
- Latex gloves
- Pen and paper (to record incidents and treatment)
GROUP DEVELOPMENT: The first sub-group was made when we allocated the housing. We decided to split the three houses into three groups; two vegetarian houses and one house who ate meat. I was in the meat eaters’ group and felt that I had a predominant role in the planning and purchasing of our meals in Kristiansand before we left for the week of skiing.
Whilst staying in the houses, I also prepared every night’s dinner along with Malte, Ho and Michelle. The other group members barely helped, and this could be seen as social loafing. Furthermore, the same behaviour pattern occurred when cleaning up after dinner each night and on Friday when we had to clean the entire house. I found this rather annoying that it was always myself, Malte, Ho and Michelle doing all the work in the house.